


Are you running a blog, an expert guide, a store and wondering how to create invoices in WordPress? In this article, I’ll show how to do it in five minutes. You’ll also learn how to create a manual WooCommerce invoice and send the invoice to your customer. Then how to send PDF invoices to your clients in WooCommerce automatically. Use the Flexible PDF Invoices plugin and focus on your business!
In this article, you will learn about PDF invoices in WordPress. Also, about creating a manual invoice in WooCommerce (for orders and outside them) at any time. You will be able to send such a WooCommerce invoice manually to your customer. Of course, with the necessary order details and customer data on the manual invoice. All of these options are in one plugin!
- How to create PDF invoices in WordPress
- Issue and send a manual invoice in WooCommerce with a free plugin
- Create and send PDF invoices in WooCommerce automatically
- Flexible PDF Invoices plugin in your language
How to create an invoice in WordPress?
1. Install Flexible PDF Invoices plugin
Now, let’s see the process of issuing PDF invoices in WordPress in a situation where there is no classic order form on the website. This situation occurs especially if the agreement is made through the contact form or other communication channels. In this situation, you should enter all the customer or product data, tax rate, net price, and other information.
First, install & activate the Flexible Invoices for WooCommerce & WordPress plugin.
2. Add New Invoice in WordPress
After that, go to the menu on the left side of the admin panel to the Invoices tab.
If you hover over it, the plugin menu will expand. If you want to quickly issue a document from scratch, select Add New.
You may also go to All Invoices, a panel with PDF invoices for WordPress will open, at the top of which you will see the Add New button.
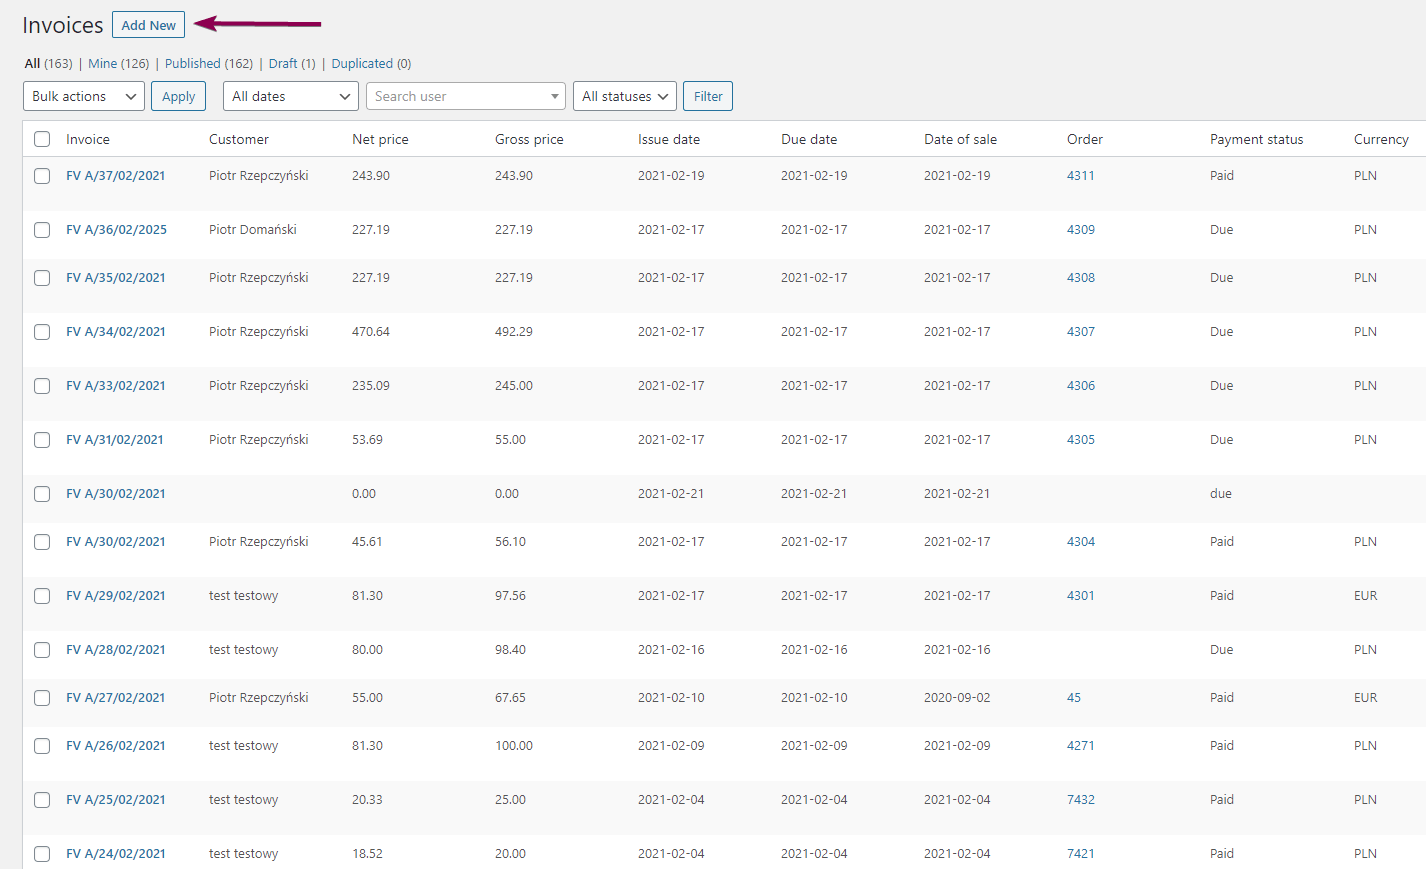
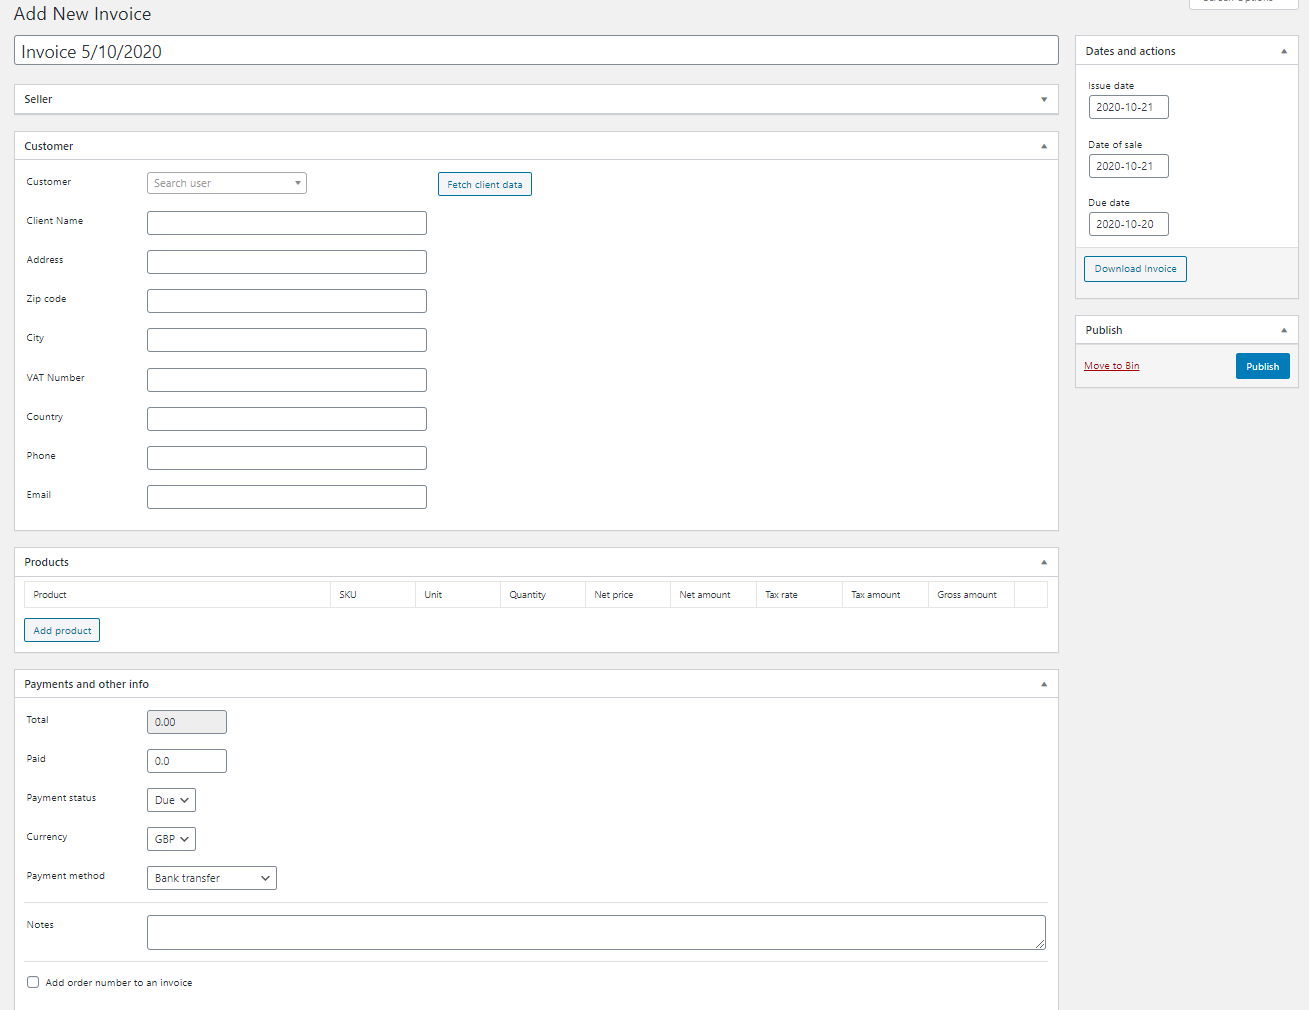
After clicking the Add New link/ button, a panel for adding a new invoice will open.
3. Create an invoice
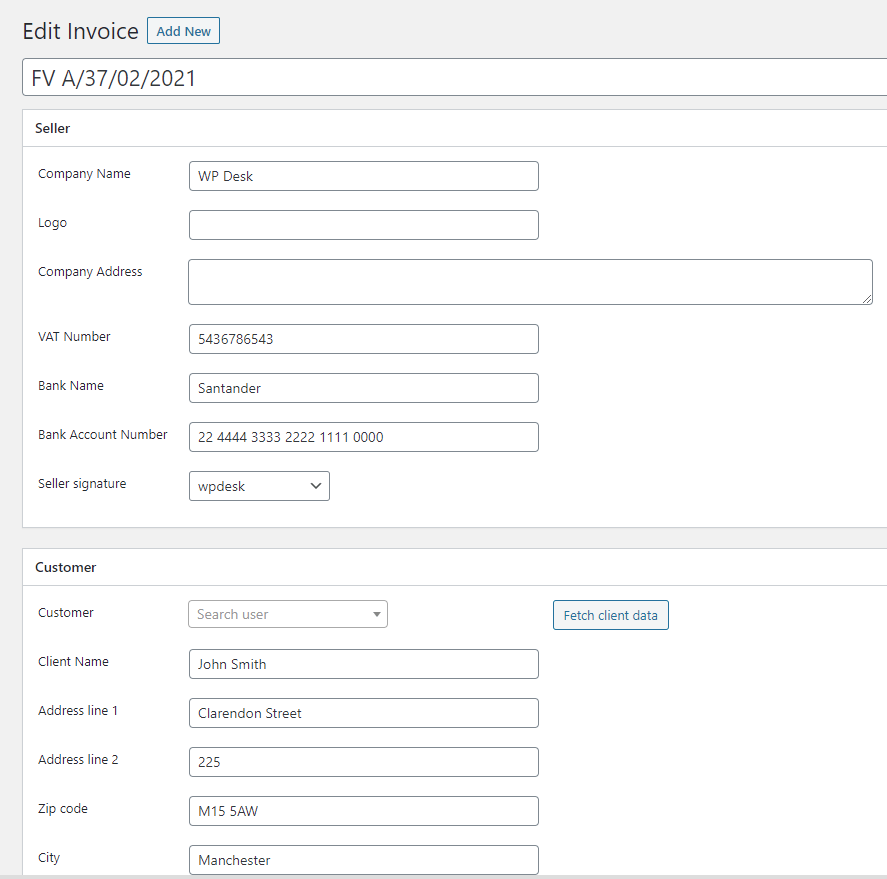
The first thing to fill in will be the data in the field Seller. You can set this information in the plugin settings, in the General tab, so that each time you start creating a new PDF invoice in WordPress it will be filled in automatically. If you prefer, you can fill in the vendor data on an ongoing basis, each time you create a new invoice.

4. Customer invoice data & WooCommerce order details
You can save a lot of time by fetching the customer data automatically.
After you have filled in the seller data, you can start filling data in the customer fields. In the Customer field, you can search for customers from the database. On the right, there is also a Fetch client data button, allowing getting the necessary customer data into the required fields.
You can also add a new customer by manually filling in the available fields: Client name, Address line 1, Address line 2, Zip code, City, VAT Number, Country, Phone, and Email.
The two basic sections, Seller and Customer, are behind you.
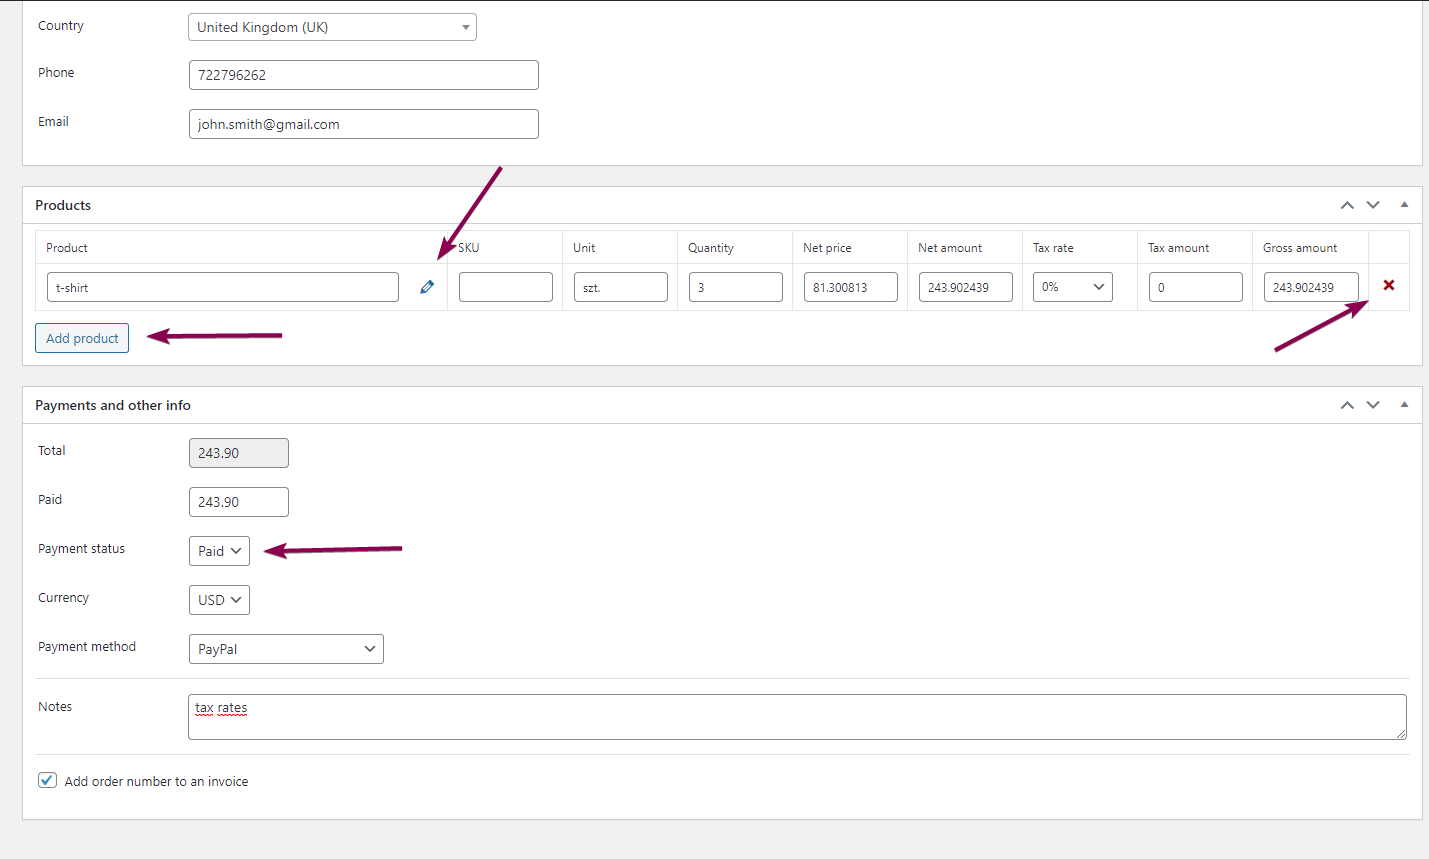
Now it’s time to fill the invoice with the most important content – Products. There is a separate column with a table where you can find Product, SKU, Unit, Quantity, Net Price, Net Amount, Tax Rate, Tax Amount, and Gross amount.
5. Add products to a PDF invoice in WordPress?
Below the table, there is the Add product button. When you click it a panel with a field for searching products from the WooCommerce Products will open. You may enter 3 or more characters and the plugin will search for the existing products from your WooCommerce.
You may also add a product manually. Next to the product name field, you will see a pencil symbol. It allows you to enter the names of the products manually.
Once you enter products, you can edit their names and data in the table (SKU, Unit, Quantity, Net Price, etc.).
The only defined field with a choice will be Tax rate, where you can find tax rates defined in the plugin (or taken from WooCommerce tax rates settings). Read more about setting WooCommerce taxes.
Of course, by selecting the Add product button again, you may add more products to the PDF invoice in WordPress. If you made a mistake and add too many items, you can use the red cross on the right side of the table and remove the unnecessary items. When you have the list of products ready, don’t forget to add shipping.
6. Payment info and additional invoice notes
Under the Products, there is the Payment and other info section. This is the place where you can find information about the total amount that the customer will have to pay when he receives the document. You can also fill in the field Paid if the customer has already paid for the order. Depending on the payment, you can choose the status of the invoice. There are two options: Paid or Due.
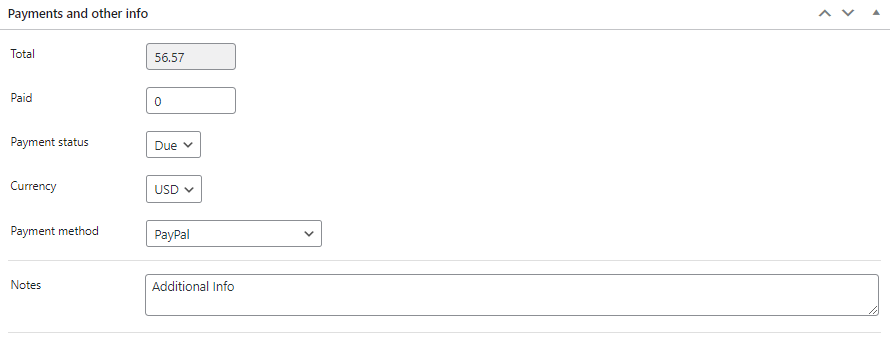
You can also choose the currency of the PDF invoice outside WooCommerce and the payment method. At the end of this section, finally, there are Notes. Here you can write, for example, the order number, information about tax regulations, and additional annotations.
7. Create and send an invoice to your customer
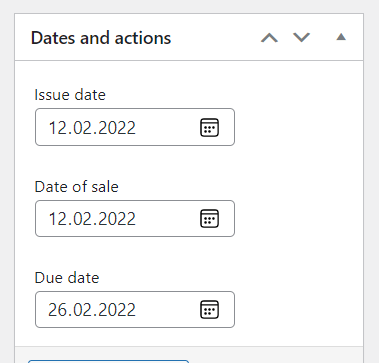
Congratulations. What’s left to do is to set up the issue, sale, and payment dates, which you will define in the Dates and Actions meta box. It’s an intuitive pop-up window with pop-up calendars. So you may simply select the date field and mark the date you are interested in.
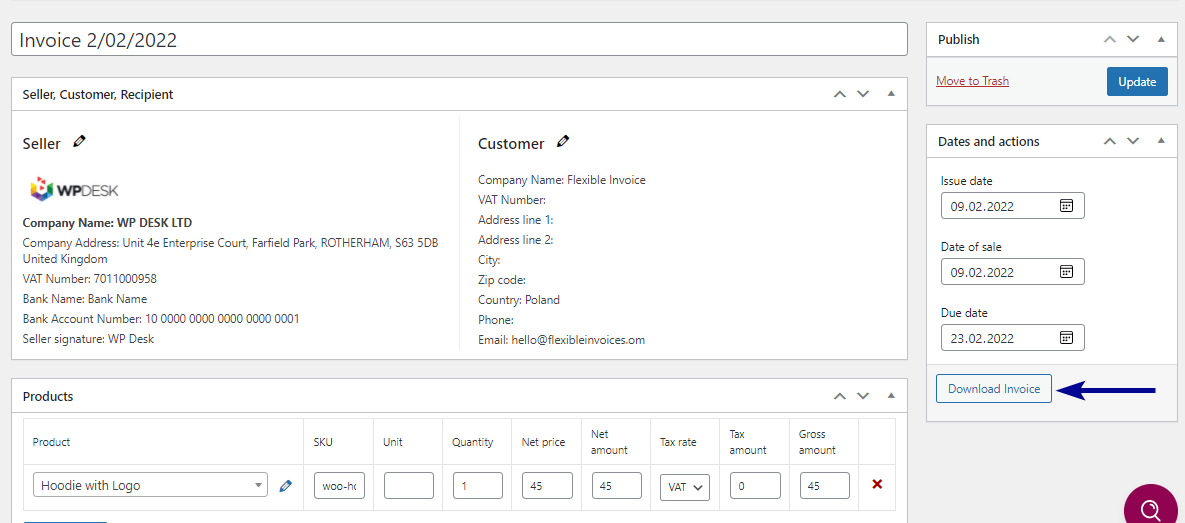
And finally, the crème de la crème of PDF invoice in WordPress creation, the Publish button. When you click it, the new invoice is generated and will appear on the list of all invoices. You can still modify the document on the fly by confirming the changes with the Update button. It will appear in place of the Publish button.

The WordPress invoice or a manual invoice outside WooCommerce order is ready! Now you can download the invoice using the Download Invoice button. And send it to your customer from the invoice edit screen
and All Invoices page:
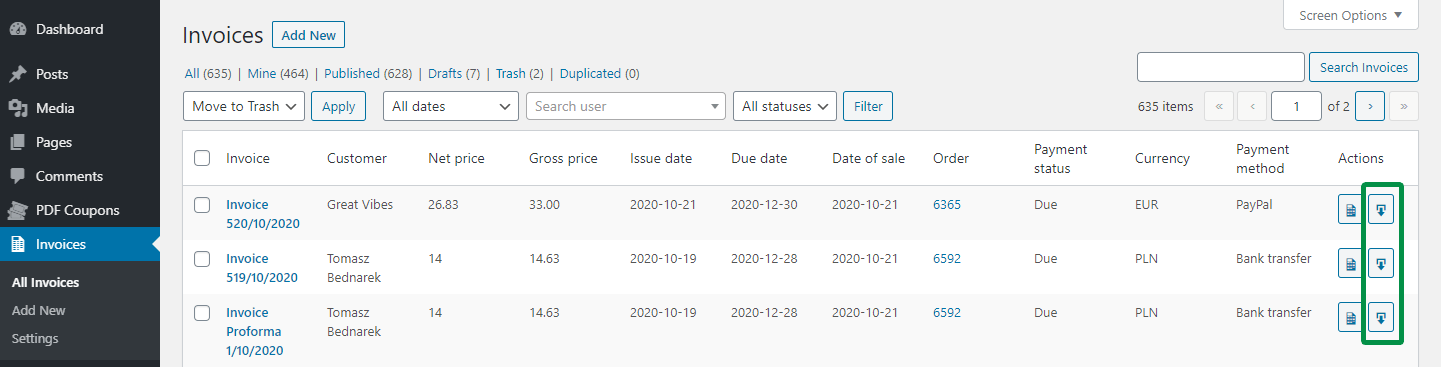
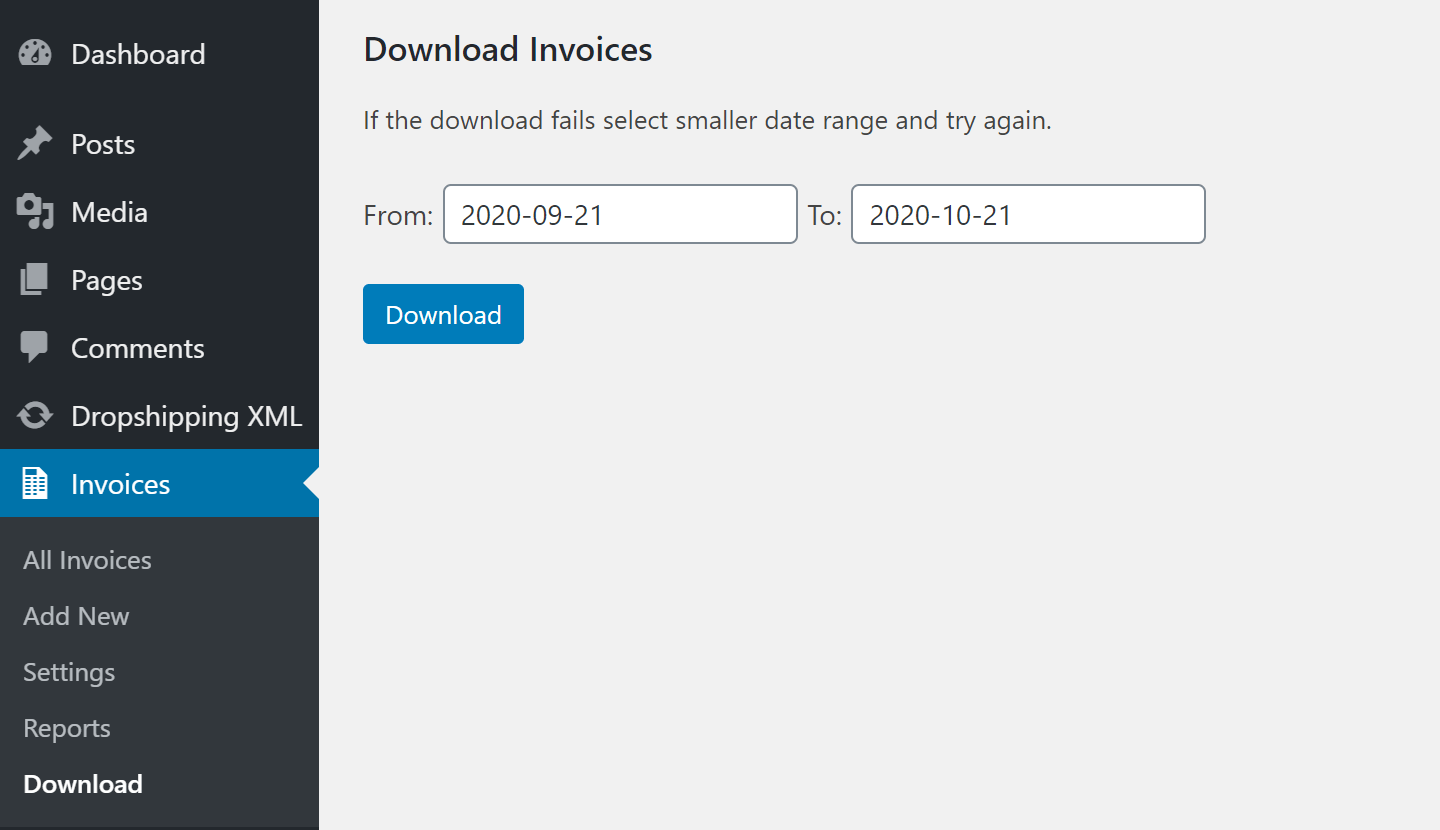
You can also download more invoices at once from the Invoices → Download submenu:
How to create and send a manual invoice in WooCommerce?
You’ve just gone through the invoicing process using Flexible Invoices for WooCommerce & WordPress when you’re on pure WordPress. This option is useful for example if you are running a blog, or you are a specialist collecting orders through regular email correspondence. The process gets faster when you already have a WooCommerce based store. You may create an invoice manually outside WooCommerce orders in a similar way as described above.
Of course, you may issue a PDF invoice directly for WooCommerce orders.
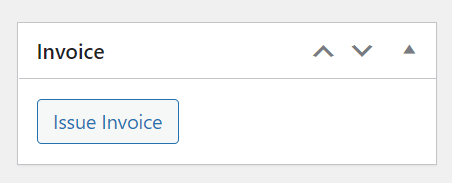
In this type of configuration, the whole tedious process of filling in data falls on the customer when placing an order. All you have to do is go to the order and find the meta box titled Invoice, then select the Issue Invoice button and that’s it. You can issue PDF invoices for WooCommerce orders from the Order Edit screen,
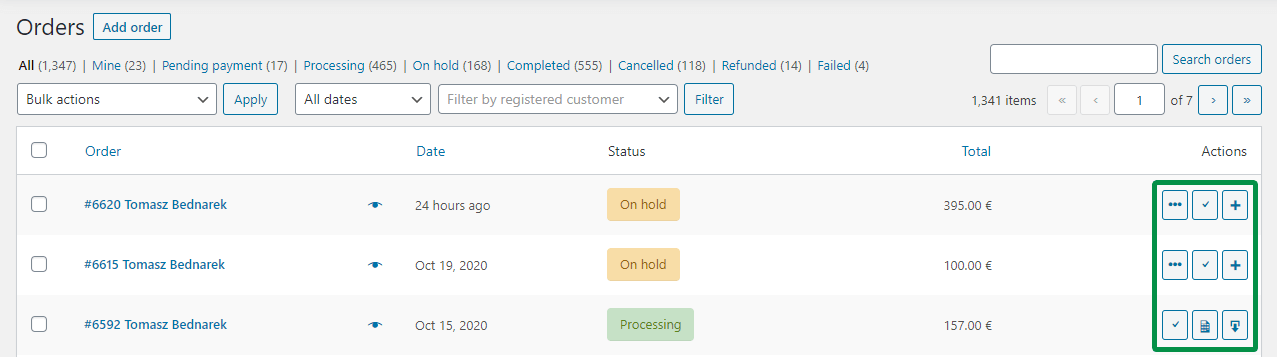
the Orders page,
and add/ edit a WooCommerce invoice as manual invoices.
How to send an invoice to a customer in WooCommerce with a free plugin manually?
Download the Flexible PDF Invoices plugin, follow the instruction above. Then send your invoices to your customer manually. Also, download all invoices in bulk, for example, if you need to send them to your accounting office.
The bulk download of invoices option is in the Invoices → Download submenu.
Automatically create and send PDF invoices in WooCommerce
As you can see, you can issue and send WooCommerce invoices to your customer manually. It’s enough if you have a few orders/ invoices per month. But let’s imagine what happens on a Sunday evening when you look in the store and there are 250 invoices to issue?
On the one hand, you are happy because business is booming. On the other hand, you are aware that you will either spend the whole Sunday evening on invoicing or postpone this duty until Monday morning. The solution is to outsource the administrative duties to a newly hired store administrator or an employee.
Is it possible to automate invoicing in WooCommerce?
Yes, such automation is possible! See how to do it in WooCommerce. The plugin will issue invoices for you for the order status you choose, for example after online payments. So there is no need to visit the store to issue invoices.
In the PRO version of Flexible Invoices, you can issue three types of invoices (simple, proforma, and correction). So, you may process refund requests easily as well.
Then download all invoices and generate the sales report once a week/ month. Invoices will also be sent to your customer automatically. It sounds like a fairy tale, but it is reality.
The automatic invoicing option is available in the PRO version of the plugin. The cost is still much, much, much cheaper than hiring an administrative support person.
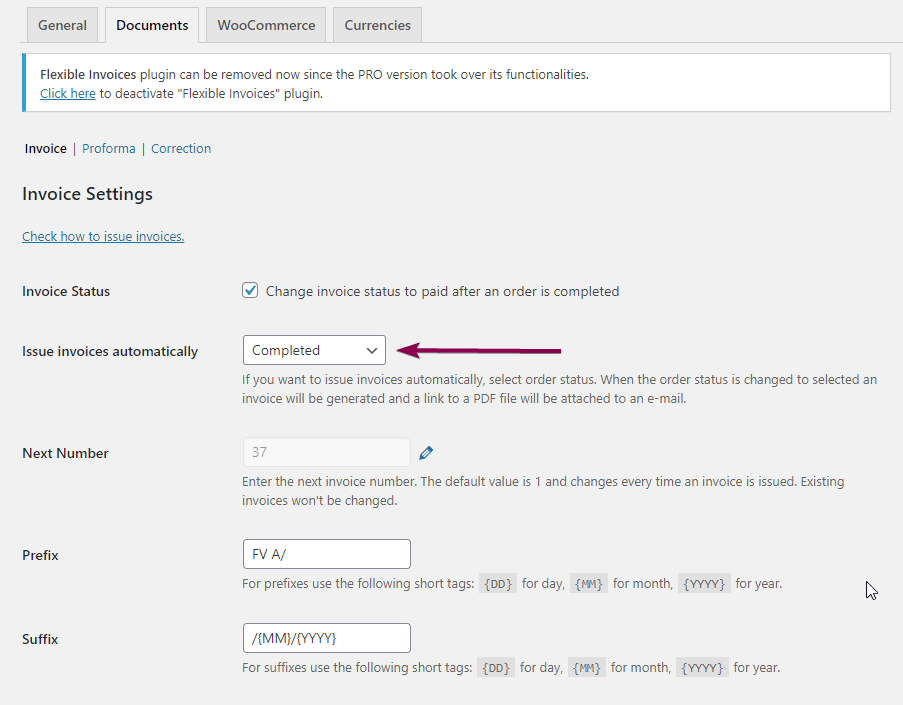
Automatic invoicing can be set up by going to Invoices > Settings > Invoice. Set WooCommerce order statuses at which the document will be issued automatically. Read more on how to set WooCommerce invoice emails and send PDF invoices to your customer automatically.
The plugin allows you to issue invoices in WooCommerce for EU customers as well. Read more on how to set up tax rates in WooCommerce for EU invoices.
Flexible PDF Invoices for WordPress and WooCommerce plugin in your language
Are you looking for a WooCommerce Invoice system, facture WooCommerce, faktury WooCommerce, e-boekhouden WooCommerce?
If you want to issue invoices in more languages you can do that too! The plugin is translated into English but also French, Spanish, Italian, Polish & Dutch. You may use your own translations with .po files. The plugin supports WPML as well!
Flexible PDF Invoices free vs PRO
The PRO version of the plugin has more features than the basic version. You can compare them in the table below. You can also test both versions (and the PRO add-ons) in your free demo store. You can freely configure and test the plugin there according to your needs.
Check to what extent the plugin will realize the scenarios assumed by you. If you have any questions, I encourage you to take a look at the documentation.
| Flexible Invoices free vs PRO | free | PRO |
|---|---|---|
General | ||
| Generate documents automatically | ||
| Send invoice automatically by e-mail | ||
| Send invoice manually by e-mail | ||
| Issue PDF invoices | ||
| Basic reports | ||
| Variations support | ||
| Batch PDF download | ||
Documents | ||
| Proforma invoices | ||
| Correction invoices | ||
Checkout & My Account | ||
| Access invoices from My Account | ||
| Ask the customer if he wants an invoice | ||
| Add VAT Number filed to checkout | ||
Customizing | ||
| Hiding VAT columns | ||
| Hiding seller VAT Number | ||
| Company logo on the invoice | ||
| Sequential order number | ||
| Reset next invoice number | ||
| Seller signature | ||
| Currency exchange table | ||
| Payment link on the invoice | ||
| Hide free items | ||
EU VAT | ||
| EU VAT Number validation | ||
| OSS handling (formerly MOSS) | ||
| Download Free | Buy PRO |
Do you think that the option to send the invoice to the customer manually/ automatically makes the difference when running your WordPress/ WooCommerce? Let’s talk! If you have any questions contact our support.