Everyone will tell you how great WooCommerce is. And they’re right! However, most of us just need a simple invoicing system for our small businesses. The Flexible Invoices for WooCommerce plugin lets you create a beautiful PDF WooCommerce receipt without the hassle of having to use complicated accounting software. Learn how to create WooCommerce receipts today!
Some Background
WooCommerce is a WordPress solution available through their extensive plugin library, allowing you to sell all kinds of products. This ability to create and sell (physical) products opens up many potential doors for your business – but sometimes there are legal limitations attached.
One such limitation is WooCommerce receipt creation – most countries require you to give out a WooCommerce receipt when selling physical goods and services so that the buyer can use it for tax purposes.
WooCommerce invoicing can be a pain. Several solutions are out there but they all have limitations and may not even support VAT. At FlexibleInvoices.com, we develop an awesome free plugin that will help you customize, brand, style, and deliver professional-looking receipts.
Table of Contents
In this article, you’ll read about:
Standard WooCommerce receipt
If you are using a clean WooCommerce install, the only receipt you can send to your clients is that one used in standard transaction emails:
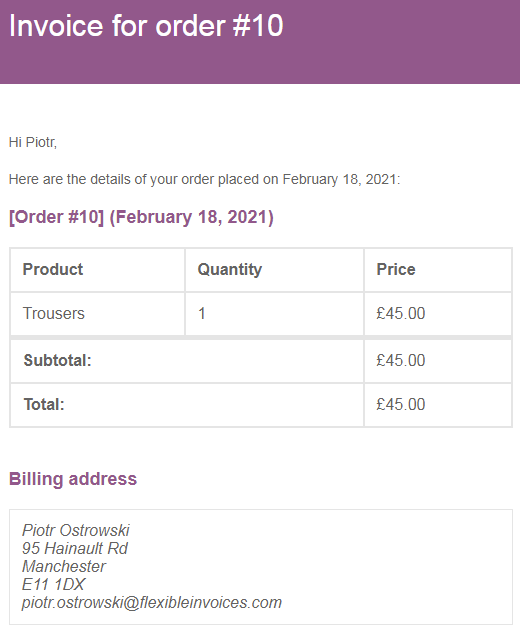
It cannot be downloaded or saved. It only exists in your email inbox. Not very helpful, right? Let’s find out how to quickly generate a PDF WooCommerce receipt using a free plugin!
Step 1 – Install Flexible Invoices plugin
Firstly, install our free Flexible Invoices plugin in order to generate a WooCommerce receipt later. Go to Plugins, then click Add New and type in Flexible Invoices:

After installing the plugin, please activate it by clicking the Activate button as soon as the download process is finished.
Step 2 – Fill in your business details
After installing and activating the free plugin, please type in your company’s details. A new menu item will appear in your WordPress dashboard. Go to Invoices and click the Options submenu:
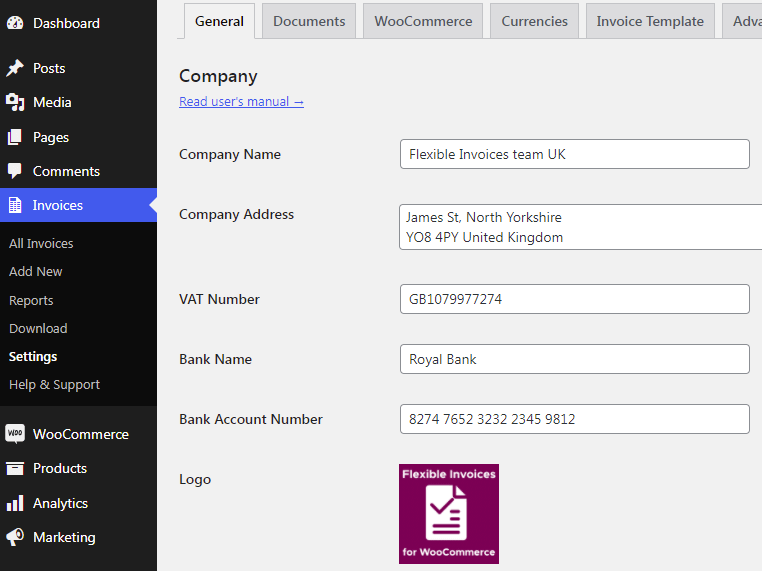
Fill in the following information required to generate a correct WooCommerce receipt:
- Company Name – your registered company business name
- Company Address – the address of your company
- VAT Number – if you have one
- Bank Name and Bank Account Number – fill in your bank details of accepting bank transfers
- Logo – use Media Gallery to find the logo of your company which will appear on the WooCommerce receipt
Step 3 – Enter WooCommerce receipt as a prefix
The next step is to add a proper name to your generated PDF documents. By default, the plugin will give each document an Invoice name. In this example, we will use a Receipt instead. Please go to the Documents tab and type in Receipt as a prefix:
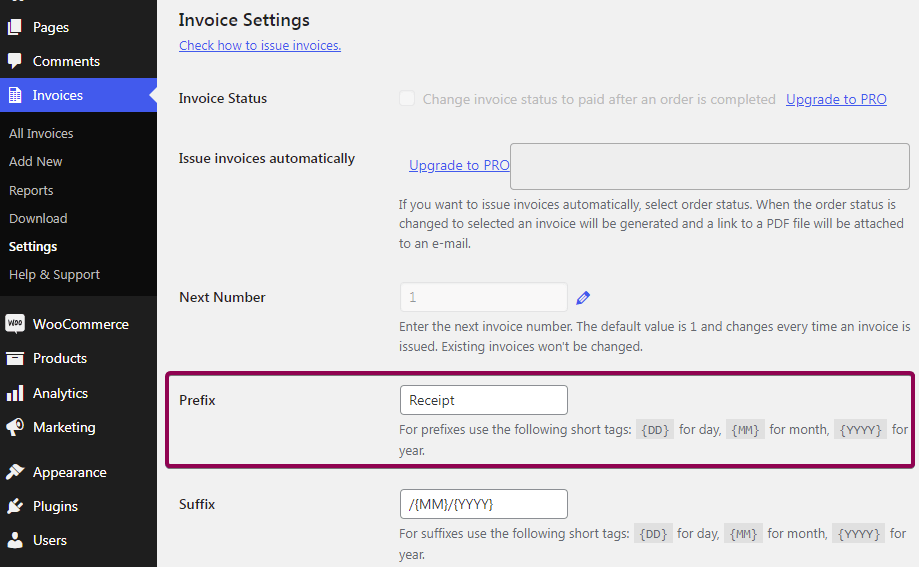
Don’t forget to add a blank space after the prefix if you want it to be separated from the WooCommerce receipt number. You can adjust your document names by using the following short tags:
- {DD} for day,
- {MM} for month,
- {YYYY} for year
The document name will contain following parts:
- prefix – in this example: Receipt
- document number – e.g. 1
- suffix – in this example a month and a year when the WooCommerce receipt has been created.
Step 4 – Generate WooCommerce receipt
Okay, sou you are ready to go! Please go to your WooCommerce edit order screen. You will notice a new metabox on the right side of the screen. There is a button Issue Invoice that will let you generate a WooCommerce receipt:

After clicking that button, a new receipt PDF will be generated and saved in your store admin panel.
Step 5 – View receipt
Alright, so your new WooCommerce receipt has been generated. you can either View or Download the document using the buttons in the Flexible Invoices metabox:

As you can see, the document has been given a number 1 – as it was a first receipt created in my WooCommerce shop. The next number will be 2, 3 and so on…
Step 6 – Save your PDF WooCommerce receipt to your hard disk
Ka-ching! Your receipt has been generated and you have downloaded it to your disk. You can now use it for tax purposes. This is how the final effect will look:
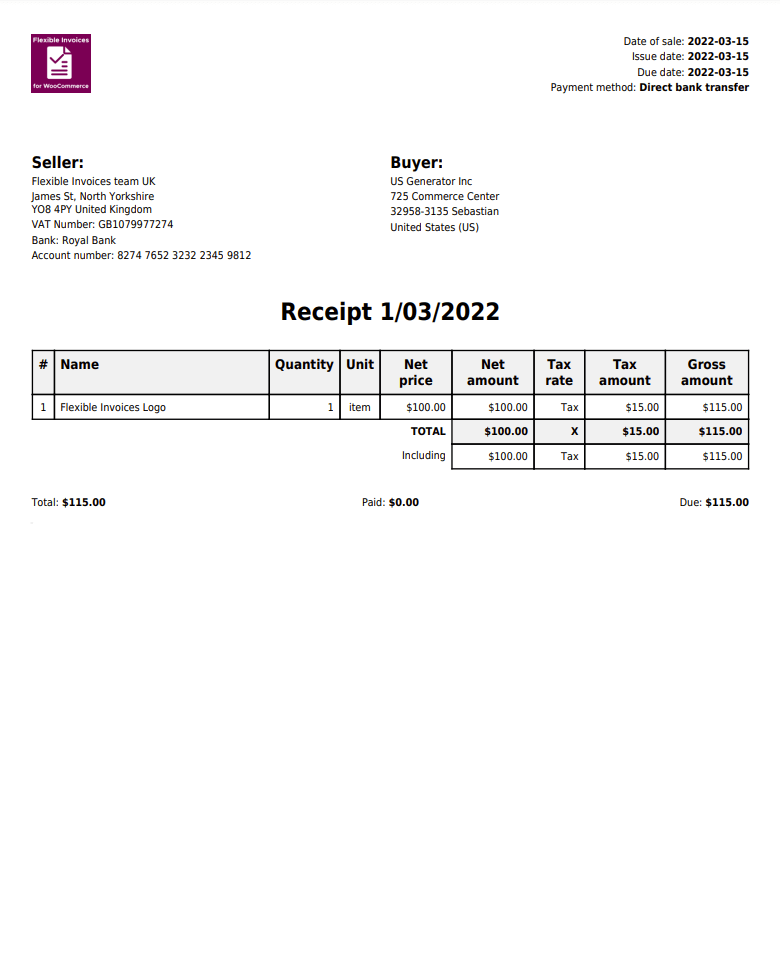
In my opinion, it is a very clean and readable document, which adds professionalism to your business. Don’t you think so?
Step 7 – send the PDF receipt to your customer using email
In the final step, email the PDF receipt to your customer by using built-in email features. Go to edit screen. There is a button Send by e-mail. Clicking it will immediately send the customer a link to download the PDF receipt:
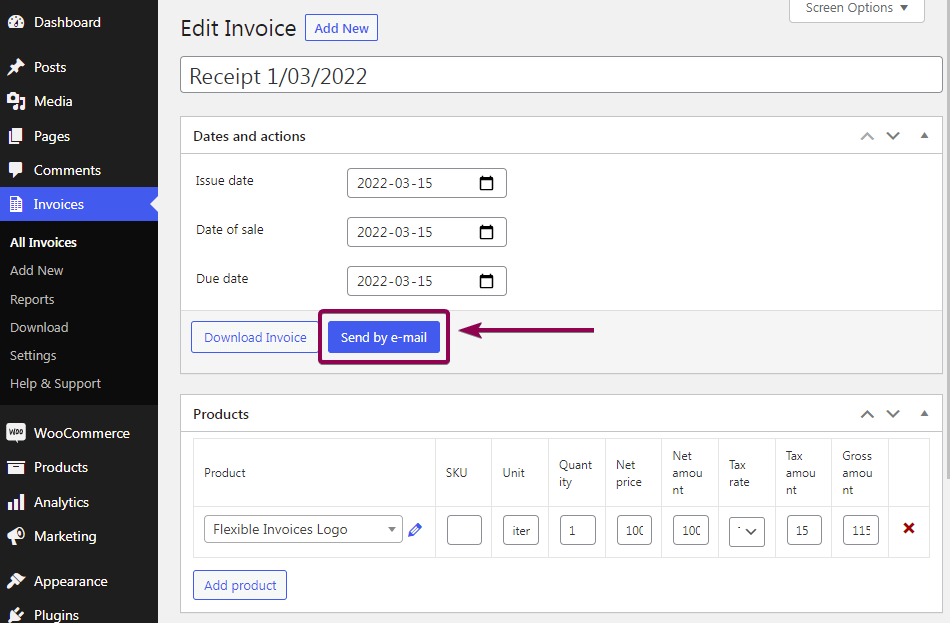
More flexible than the standard built-in WooCommerce receipt feature that I have presented at the beginning, right? 🙂
Automatic WooCommerce Receipts in PRO version
How about going a step further and enabling automation? Wouldn’t it be nice if your customers would automatically receive WooCommerce PDF receipts right after the purchase? It is easy to set up with the PRO version of the plugin, which you can buy using the button below:
With the PRO version, you will be able to automatically send the receipt to the customer after purchase. Just choose the order statuses on the configuration page and you are ready to go:
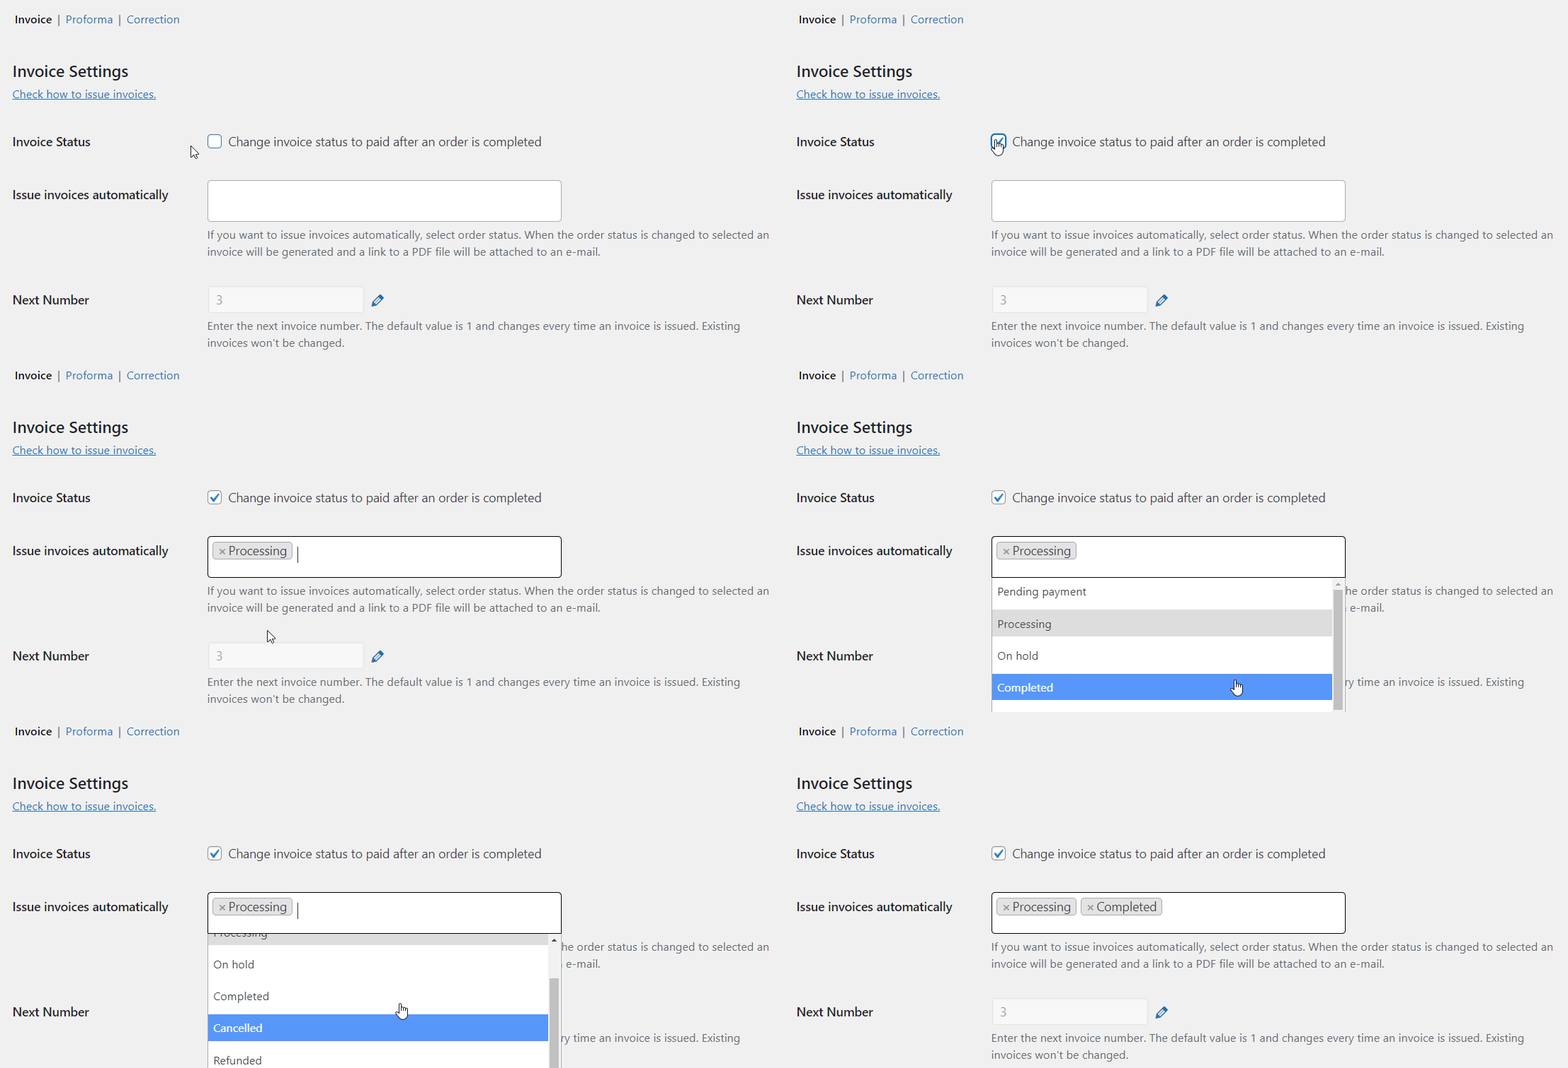
As a result, the receipt is automatically sent to the client using the WooCommerce email service after his purchase in the shop.
You may test the free and PRO version of Flexible Invoices in a free demo.
If you have any questions please contact our support team by choosing the Pre-sale Question option!


